Tuesday, December 1, 2015

Orange Cat chair


This is a story of one of four chairs that I did for a customer, Linda, who has become an interesting new friend in the process.

What a Prrrr fectly fine chair! This little chair actually had a broken cane seat. It looked kind of sad until Jim, Linda's husband, put a solid wooden seat on the hole where the cane was. I painted a piece of canvas, put some batting under it, and tacked it down with  upholstery tacks. It turned out kinda cute don't you think?  Not bad for an old chair that had seen better days and probably was never going to be in anyone's dining room again....until now!


Want to know how I do the seat? Well, it is not as intimidating as it looks. The first thing I do is take some paper and  make a template of the wood piece I am wanting to cover up. Next I cut a piece of canvas a couple of inches bigger than the  area I want to cover.  This will be bigger than the template, because it has to cover the batting, and leave room to put the upholstery tacks down. I will trim it up better before I tack it down.  Next I paint it. I actually use a combination of artist acrylics, and craft acrylics. To insure that they stay flexible, I put some Fabric medium on my palette, and just mix it in with the paint as I go, right on the brush. No rocket science here. I get all the picture painted the way I want, and then I seal it with a flexible varnish. I use Polyurethane on the rest of the chair, but I want to make sure the picture doesn't crack when it is used. I like Liquitex flexible varnish for this part.  I don't make the batting very thick either because I don't want a lot of give to it, just a little padding to cover up the edge of the wood insert .  Just an FYI, I seal it before I tack it down.

I take the paper  template and cut a piece of batting 1/4 inch larger than the template.. Don't make this too thick or it will set up too high and look funny. I actually had about a 3/4 inch to 1 inch batting, and I thought it was too thick so I just separated it in half width wise and it was perfect.  The hard part is determining how much of an edge you want on the picture. I just tacked mine pretty close to the wood insert, and the edge of the batting. To get the batting to stay in place, spray some fabric adhesive on the wooden insert. I put plastic all around it  to prevent the sticky from getting on the chair. That would be terrible!!


I am so bad about eyeballing things instead of measuring sometimes, that I drive myself crazy. Now in hindsight, I should have measured all around the perimeter, made a mark everywhere I wanted a tack...but of course I started tacking and then started making marks when it looked like I was having trouble getting it even.... SO, what you get is a chair that has the tacks uneven with handmade charm...,. ANDDDDD do you see the one lone silver tack? I didn't even know this until someone was studying the chair (closer than I did obviously!) and ask about it! I actually had one box of antique tacks, and one box of shiny gold tacks..same style but different finish. Time to improvise. I painted the gold ones black, waited 30 to 45 seconds and wiped them off.. Now the problem came in when I was short one lousy tack and I searched everywhere. Finally I found one, whew!  painted it, and tacked it on, only to realize (after it was pointed out to me by someone who was studying the tacks a lot closer than I was...) that it was silver!!! Well, I will have to make a trip over to Linda's one of these days and replace the tack.

 She said she doesn't care, but I do,..now that I know!


How long did it take me? Wow, I always think I am going to log my hours in but I forget and get sidetracked, so I will never know for sure.  I would have to guess around 27 or 28 hours. What can I say, I get lost in the details.. :-)


If you have any questions about the process that I haven't explained, feel free to contact me by email.  at csoconnor1@gmail.com   I am happy to help in any way. Oh, and sign up with your email if you would like to get updates when I post something new. Thanks for visiting!

Have a grateful day! Carolyn

Wednesday, May 6, 2015

Blast from the Past

Looking back through some of my pictures, I saw several pieces I have not posted, so...here they are!  Hope they start the wheels turning in your head to create something.
I painted this cat picture on a piece of wood that is very similar to a TV tray top, but a lot heavier. It was at the gallery for a short while before it went to it's new home in Lincoln, NE.


Now this was a fun project. I wish I still had it but that darn Kye wanted it! Kye is a friend of mine who has several pieces of my work. She is a wonderful mosaic artist. I found this at a garage sale, (imagine that!) and it was one of those home interior type wall hangings. It was all cream colored and had, I believe some fluffy roses or something in each panel. The panels are thin board with texture on them. I knew I wanted something fun in them and this is what evolved! I love to do funky hearts, funky birds, and funky flowers. All my favorites in one place. Hope you are enjoying it Kye!


A little closer picture of the heart..


and the flowers..


even the hangers got a makeover....


and of course the goof ball bird. Notice his tennis shoes. I didn't like the way they turned out so I put grass around them and they were much better!


I displayed it on an easel I had painted, and the easel  sold the first week  :-)


Its a bed knob, it's an upside down table leg...It's a FINIAL with inspirational sayings~  This Table leg was in the mark downs at Hobby Lobby ~score--4 of them!~ and I thought I would put a table on top. But when I got started painting, I just saw it as a fun colorful finial that would brighten up any spot. I have done 4 of these and they always sell right away. People like them as gifts for graduation and such. I put little saying of hope around the base, and that seems to be very popular. Use your imagination. What have you done that was totally different from the original intended use?


 Don't throw that old table away. Keep the legs, they could also become a dragonfly body if you added some wings like www.lucydesignsonline.com ! She does awesome work. OR you could just order one from her!
https://www.etsy.com/listing/213299813/wood-dragonfly-recycled-art-sculpture?ref=shop_home_active_21

Here is my version, I had fun with it. Not nearly as intricate as Lucy's, but fun.


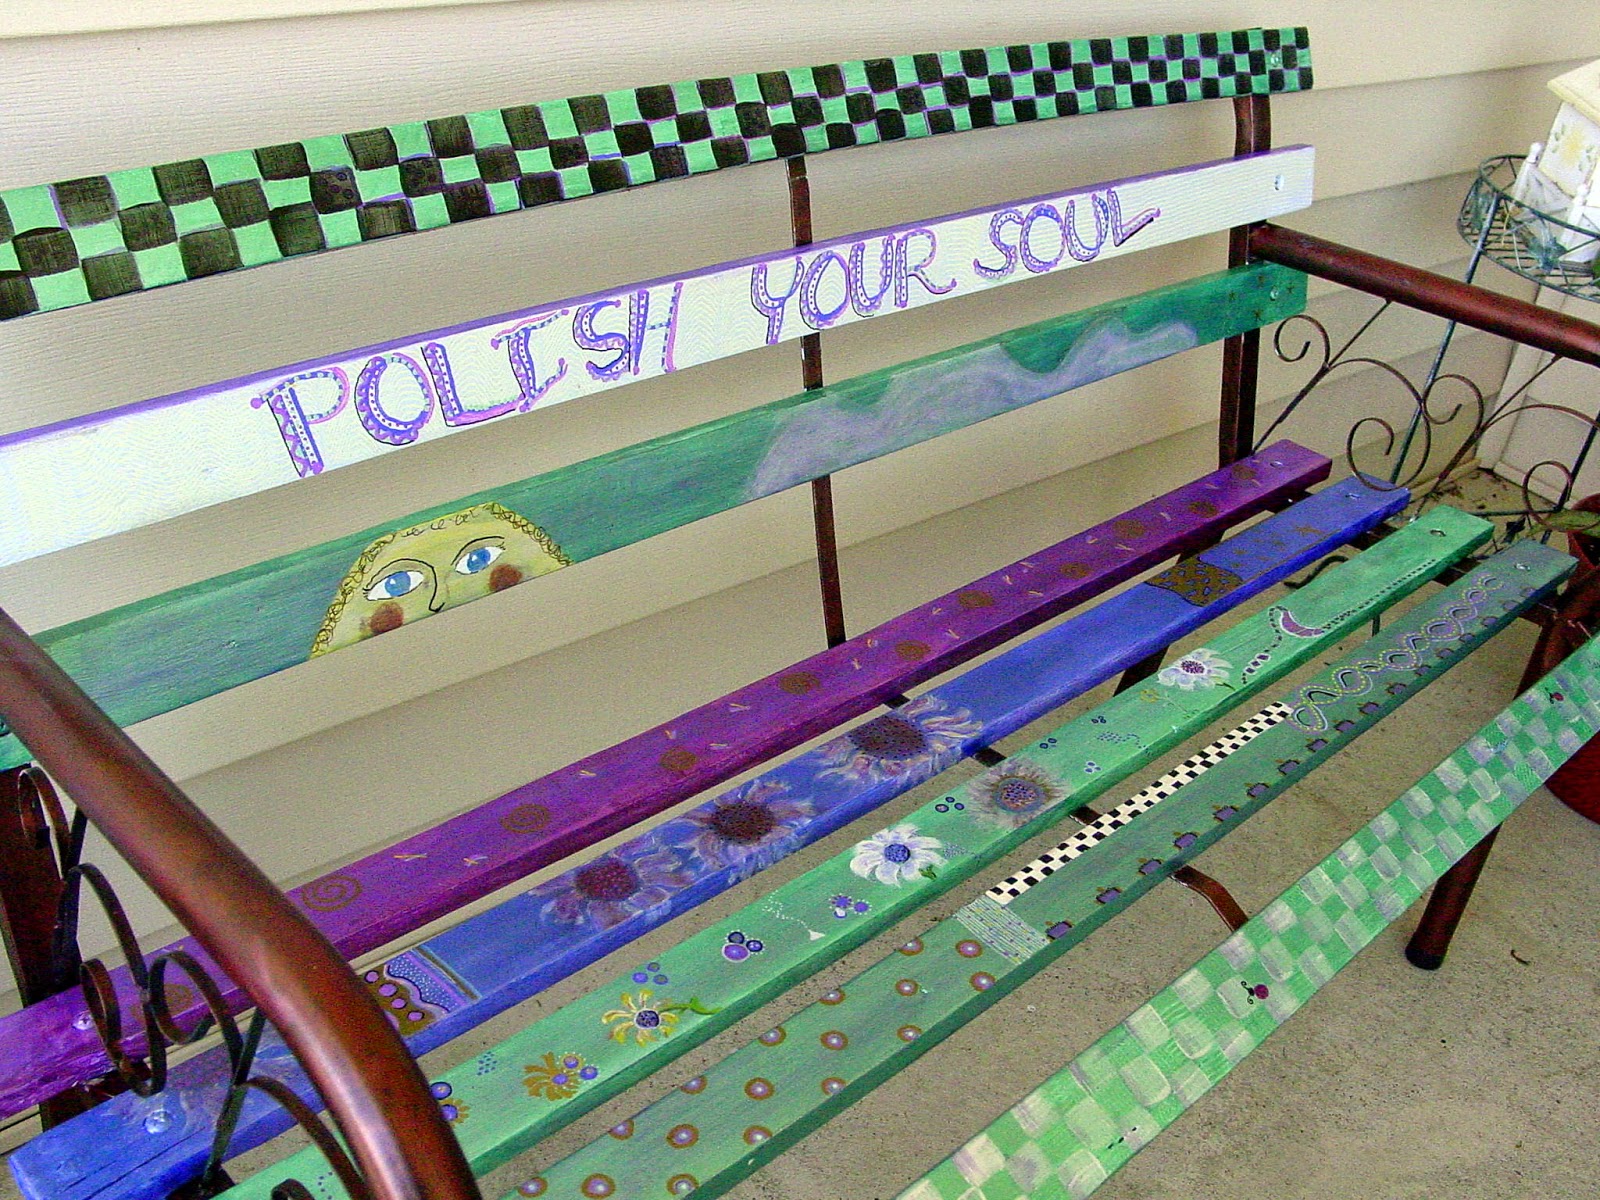
This is a bench I bought at the dollar store many years ago for ten bucks, unassembled. It was the redwood look.  I sanded it really well, and then applied several coats of exterior primer. The preparation stage is imperative to get your paint to last. I used craft paints because these blend well for what I like to do. Gussied it up a little and then applied 3 coats of exterior polyurethane. I had this sitting on my porch for about 7 years. I would bring it in in the wintertime except for the last 2 years. The paint started coming loose last year (on the ends)after sitting out and getting snowed on, frozen, thawed, frozen, thawed, (we lived in Nebraska) and morning sun.  


Pretty good run for a couple of bottles of craft paint! I sold it at my garage sale when I moved, to a very enthusiastic young couple- well, she was enthusiastic enough for both of them!! It was fun seeing her so excited about giving my old friend a new warm loving home! As far as the paint peeling,  I told her to put a couple of coats of exterior poly on it and it would be good for several more years. I was actually very surprised that the metallic paint stayed perfect on the metal parts. For the metal sides, I did a dry brushing with a couple of different copper colors.


This is a little fun clock I did for a friend of mine. She helped SOOOOO much when I was selling the house and moving. She worked in yard all day (and was such a SLAVE DRIVER)...was up early the next morning helping me put river rock down, before the couple looking at the house, came at 9:30 AM. She took all the crap I had collected over the years  treasures waiting to be painted, and got them to fit into one stall of our 3 car garage, swept it all out, (while I showered so I could be the hostess with the mostess) and finished before the future buyers arrived. She took her dog to her car and drove up the block to the corner, where she sat until they left!! They actually saw her leave as they were getting out of the car and said "your friend didn't have to leave, she's welcome to stay while we are here". Jenna said she sat on the corner in the car with her dog,  because she too dusty and sweaty to even go to Menards! So I owed her big time, but all she wanted was this clock... She also came back and helped pack because the couple loved the house!! Yayyyy! She made it look so wonderful outside I wanted to stay!(really really wanted to stay) Aren't good friends just the best?? I am so blessed with all the friends that helped me pack and move. I can't begin to repay them, but that's what friends do.. Love them all. 


When I go this, it had a nice finish but was so boring. I put the little ball feet on it, drilled holes in the top and put the little antenna things on top. I put the round ball feet on a lot of things. I think it adds to the whimsical appeal. If you look back at the dragonfly picture, you will see it in the background on the mantle waiting patiently to be transformed.


I hope you have enjoyed my Blast from the past, and want to thank you for stopping by. If you like what you see, sign up in the email box (at the top right)  to receive alerts when I publish a new post.  If I can help you with anything or answer any questions, please don't hesitate to contact me. I have made a lot of mistakes that you don't need to recreate!! LOL 
My quote for the day is "Someone out there is praying for the things you take for granted."  
Have a Grateful day. Catch you later, Carolyn

Wednesday, April 22, 2015

Hannah's step stool

Here's a fun project that I built- YES BUILT- for my granddaughter. She was having trouble reaching the sink at home. I actually figured out how tall it needed to be, then drew a shape I liked, and went from there with the measurements I wanted for the little storage area and such.
I don't even remember what kind of wood it was, but I got it at Menard's, in the area where they have boards that are sanded, packaged with plastic and ready to work on. I just wanted a really nice board...
and I liked the density of them. I know, ...it was kind of a waste because I could have gotten plywood and sanded it myself. ...but this WAS easier.


 I don't really have any before pictures because once I get going on a project I get excited and a camera is never right at hand. Now I have a really good camera in my phone, so that works really good. But too late for this project!


I got the images from a book called "A Day on the Farm". It was illustrated by Sue King, and I just love her creativeness. I drew them on freehand first, then painted them in. I can draw most things I see, but coming up with the cuteness is hard for me. Is it for you also? 


In process....Think it needs a few more cows...


Or a really big one!!!


The top step is hinged so that she can put small toys or treasures in it....


Or dirty socks...it would hold a lot of dirty socks......

The hardest part is starting, for me anyway. Once I get started, my mind comes up with all sorts of ideas.
 I hope you are have a great day.

 Remember: The rest of your life, could be the best of your life. It's all up to you!
 Blessings,
Carolyn